
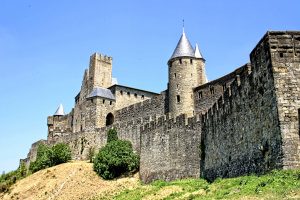
 Main subject: Geography
related subject: History
Duration: 180 minutes.
Age groups: Age 12
Submitted by: Jana Hermanussen, Germany
Learning objectives:
The students learn how to make an explainity video with its characteristic attributes. The students learn the basics of the city foundation in medieval Europe. The students have to summarize and structure the informations and practice to present the results in an explainity. The students learn a new way to present their work, increase their creativity and collaborate with others.
Implemented digital tools:
The students need an digital device with a videocut app/program. Internet connection is not necessary. Students also needs blank paper, scissors and black and coloured pens. Some support to keep the device sturdy while making the video. A smooth surface as backgroud are necessary to do the “Lege-Trick-Technik”.
Supported digital competence for student:
Information and data literacy, Communication and collaboration, Digital content creation, Problem solving
Elaboration of the competences:
The students make their own explainity video and refine their digital content creation. Communication and collaboration is learned by communicating and contemplating about the story board of their explainity and come to an aggreement. When the students learn how to do an explainity video they improve their Information and data literacy.
Preparation:
Videotool needs to be installed on the devices and the students have to be experienced in using it. Organise a construction to keep the device sturdy while making the video. Paper, scissors and pencils are needed. Open the side: https://www.youtube.com/watch?v=2uz4Vizvn6c (Gut erklärt ist gut gewusst – Lege-Trick-Technik) or https://www.youtube.com/watch?v=VNRej7mStZY (Erklärvideo erstellen) (there are many other videos in english)
Introduction
Teacher introduces the theme of the city foundation in the medieval Europ an present the thematic materials. Then the class work out the charakteristic of an explaninity by looking the presentations how to make an explainity video.
Implementation:
The students work with the thematic materials and write the story bord for the explainity video. In the second step the groups prepare the video by drawing and creating the pictures and comics (see “Lege-Trick-Technik”). After that the production of the video can be started. If more time is needed the processing time can be prolonged.
Conclusion:
The groups present their outcomes to the other students and give feedback to each other.

